
Guide: Plan Changes (upgrades / downgrades)
Welcome to our guide on changing your subscription plans on Connect! Whether you want to switch plans, add top-ups, or cancel a plan, we've got you covered. This article is designed for subscribers who need to adjust their plans and includes helpful screenshots and videos to illustrate the process.
If you're a provider looking for information on changing plans via the 🔗 Gigs Dashboard, you can find it here.
A. Changing Plans Without Usage Charts
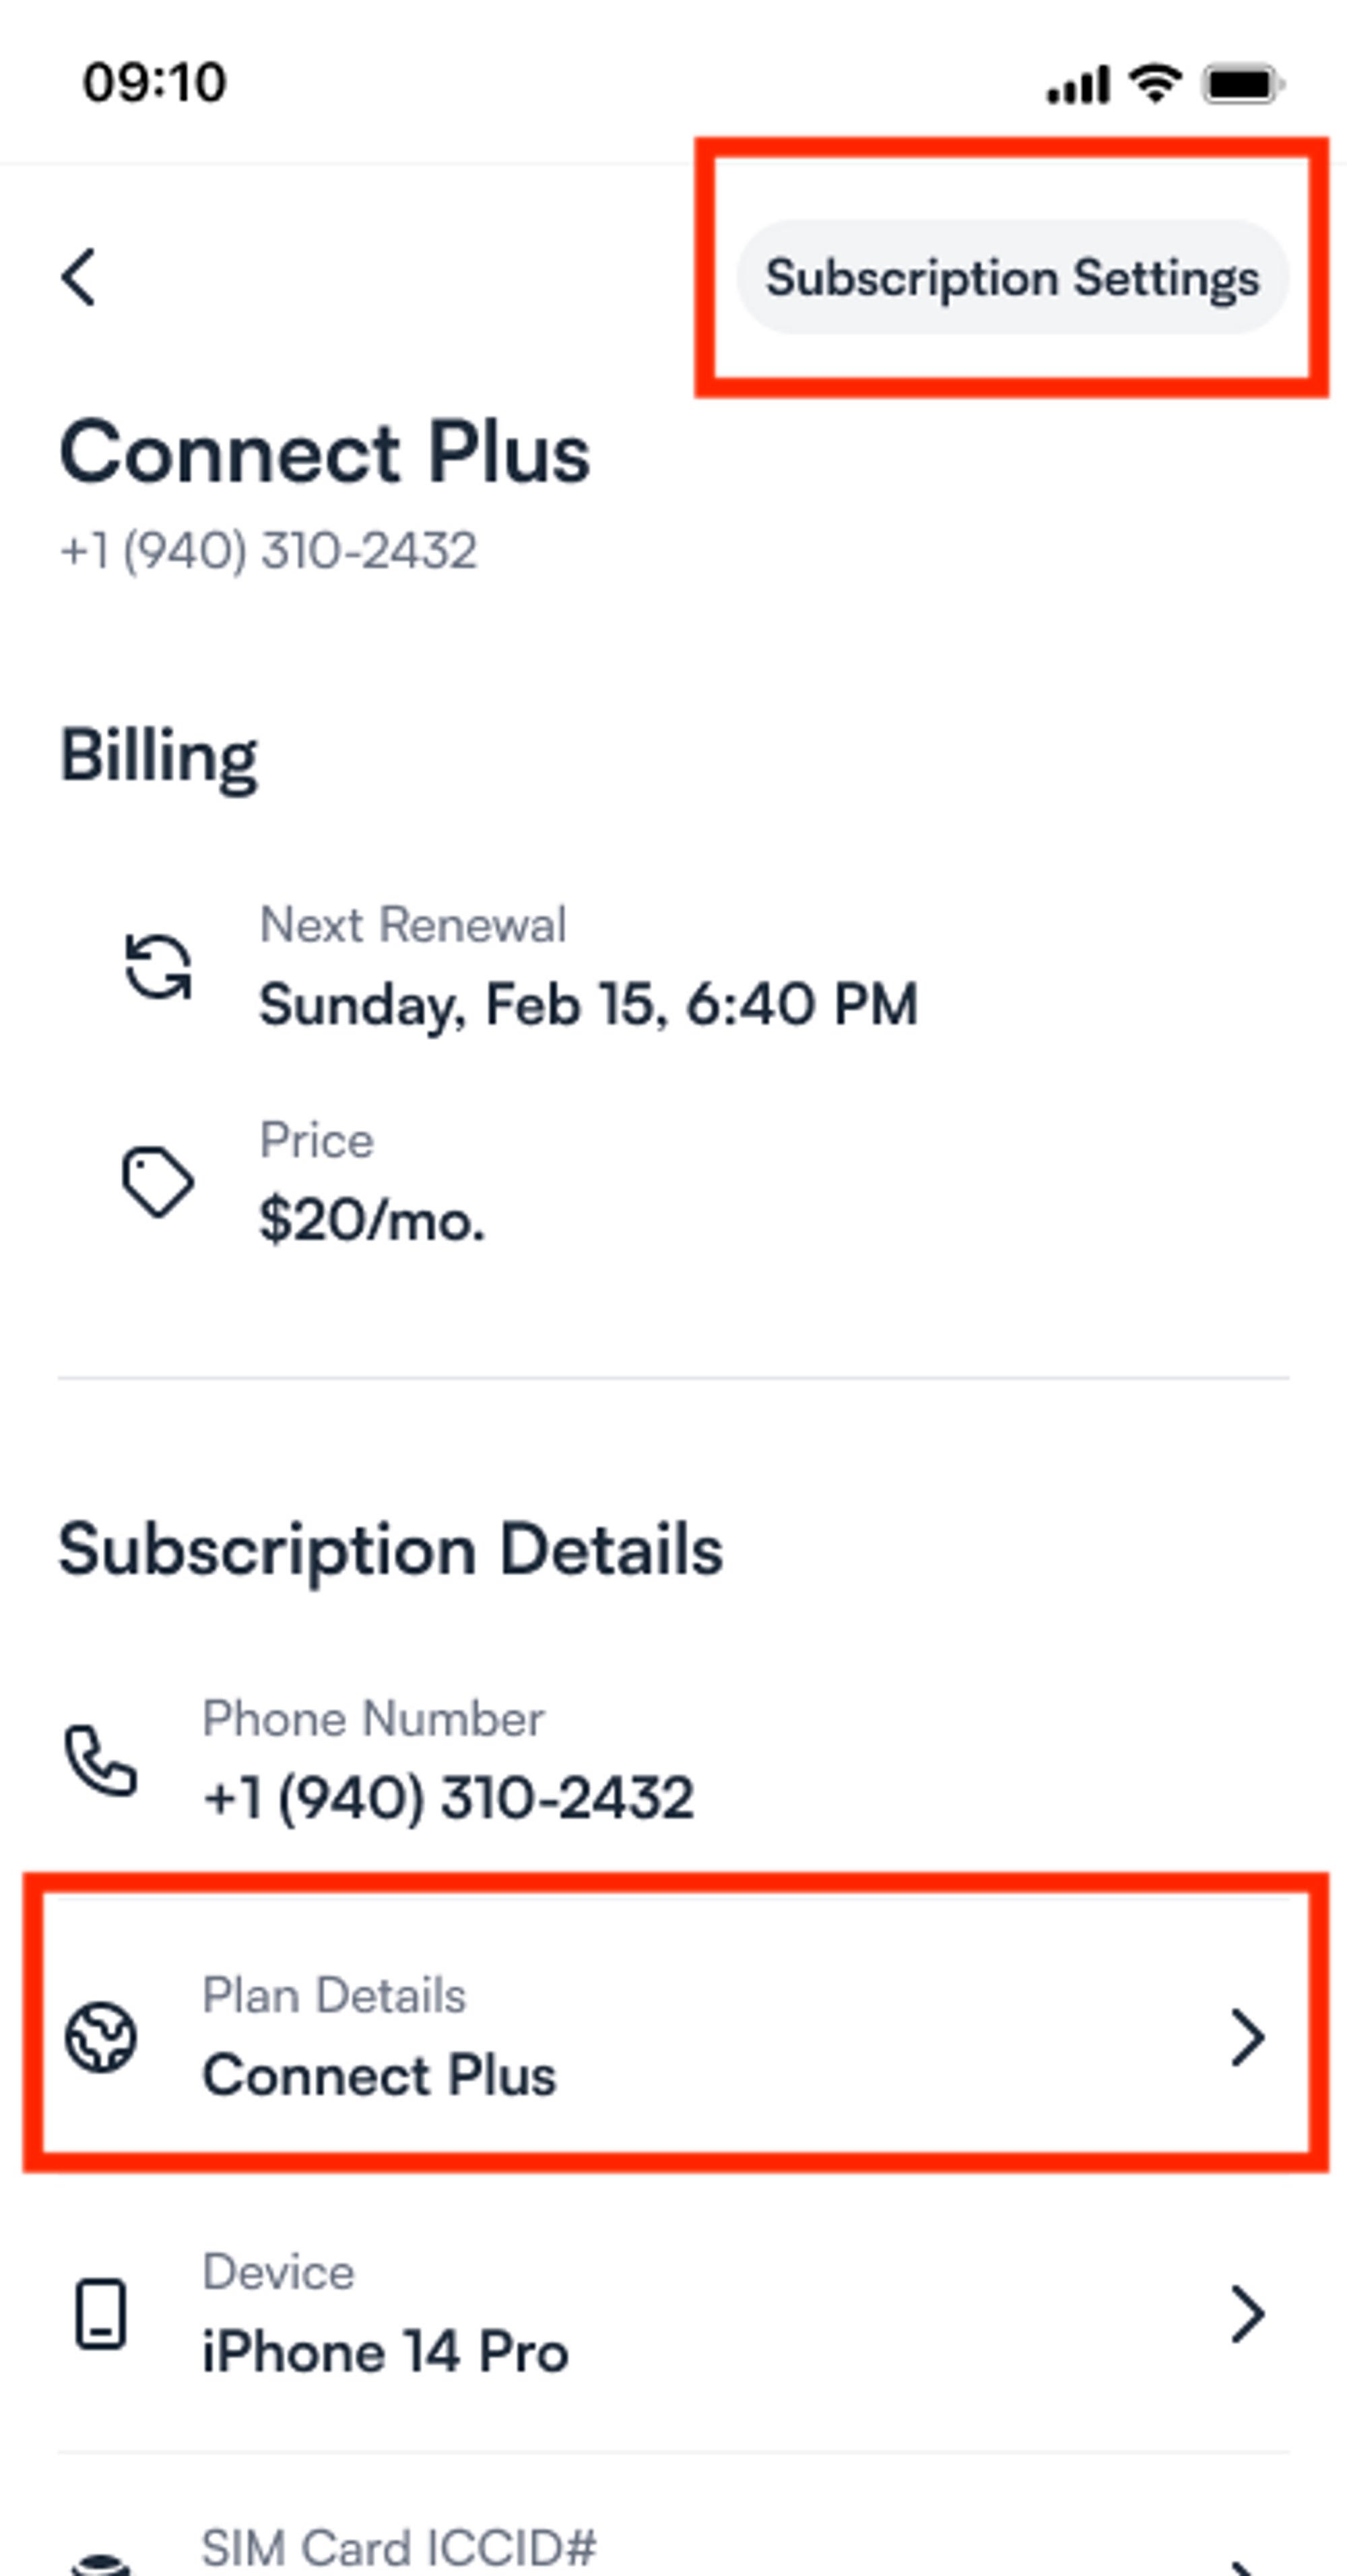
Even if Usage Charts are disabled, you can change your plans in the Subscription Settings and the Plan Details. Here’s how to do it:
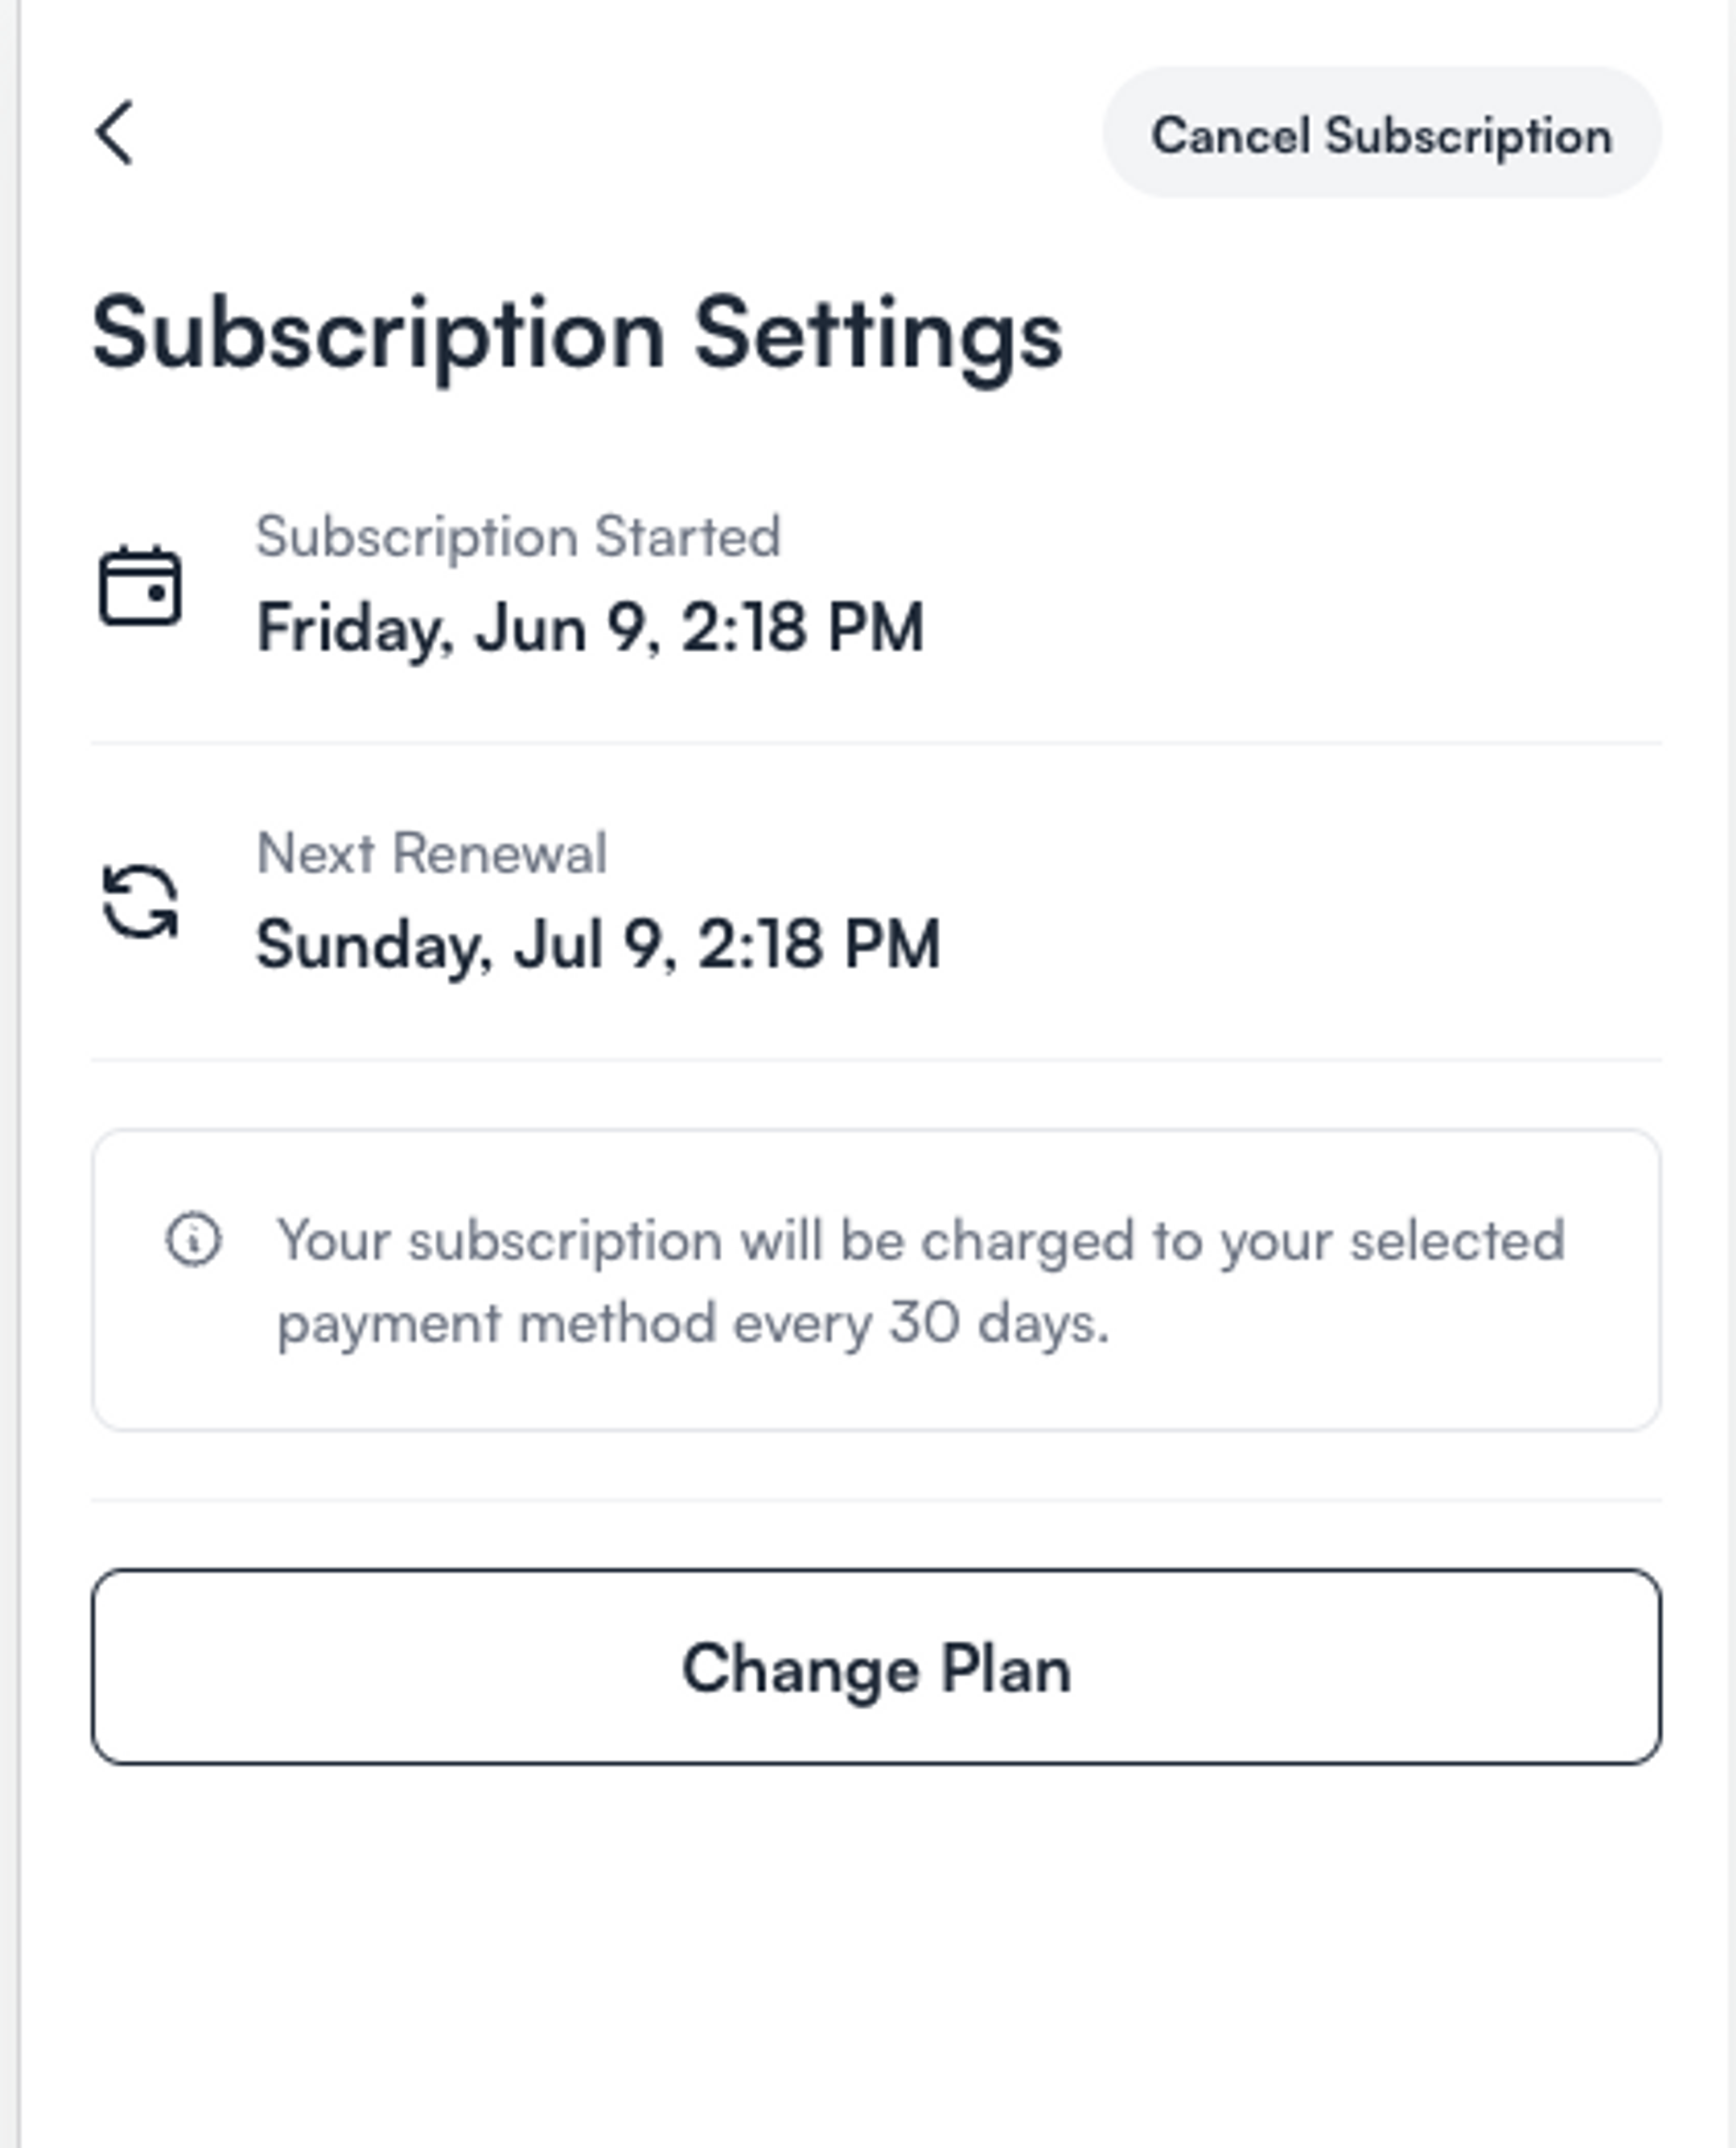
From either the Subscription Settings or Plan Details screens, click on the button labeled “Change Plans.”
You will land on the Change Plans tab (if the project has Top-ups) or the Change Plans Screen (if the project doesn’t have Top-ups). Select a new plan.
Review the plan details and click on “Select Plan.”
Proceed to the Checkout page and click “Schedule Payment.”
You will then see a success screen. Click “Continue” to finish the process.
Navigate back to your subscription to see when the plan will take effect.
B. Changing Plans With Usage Charts
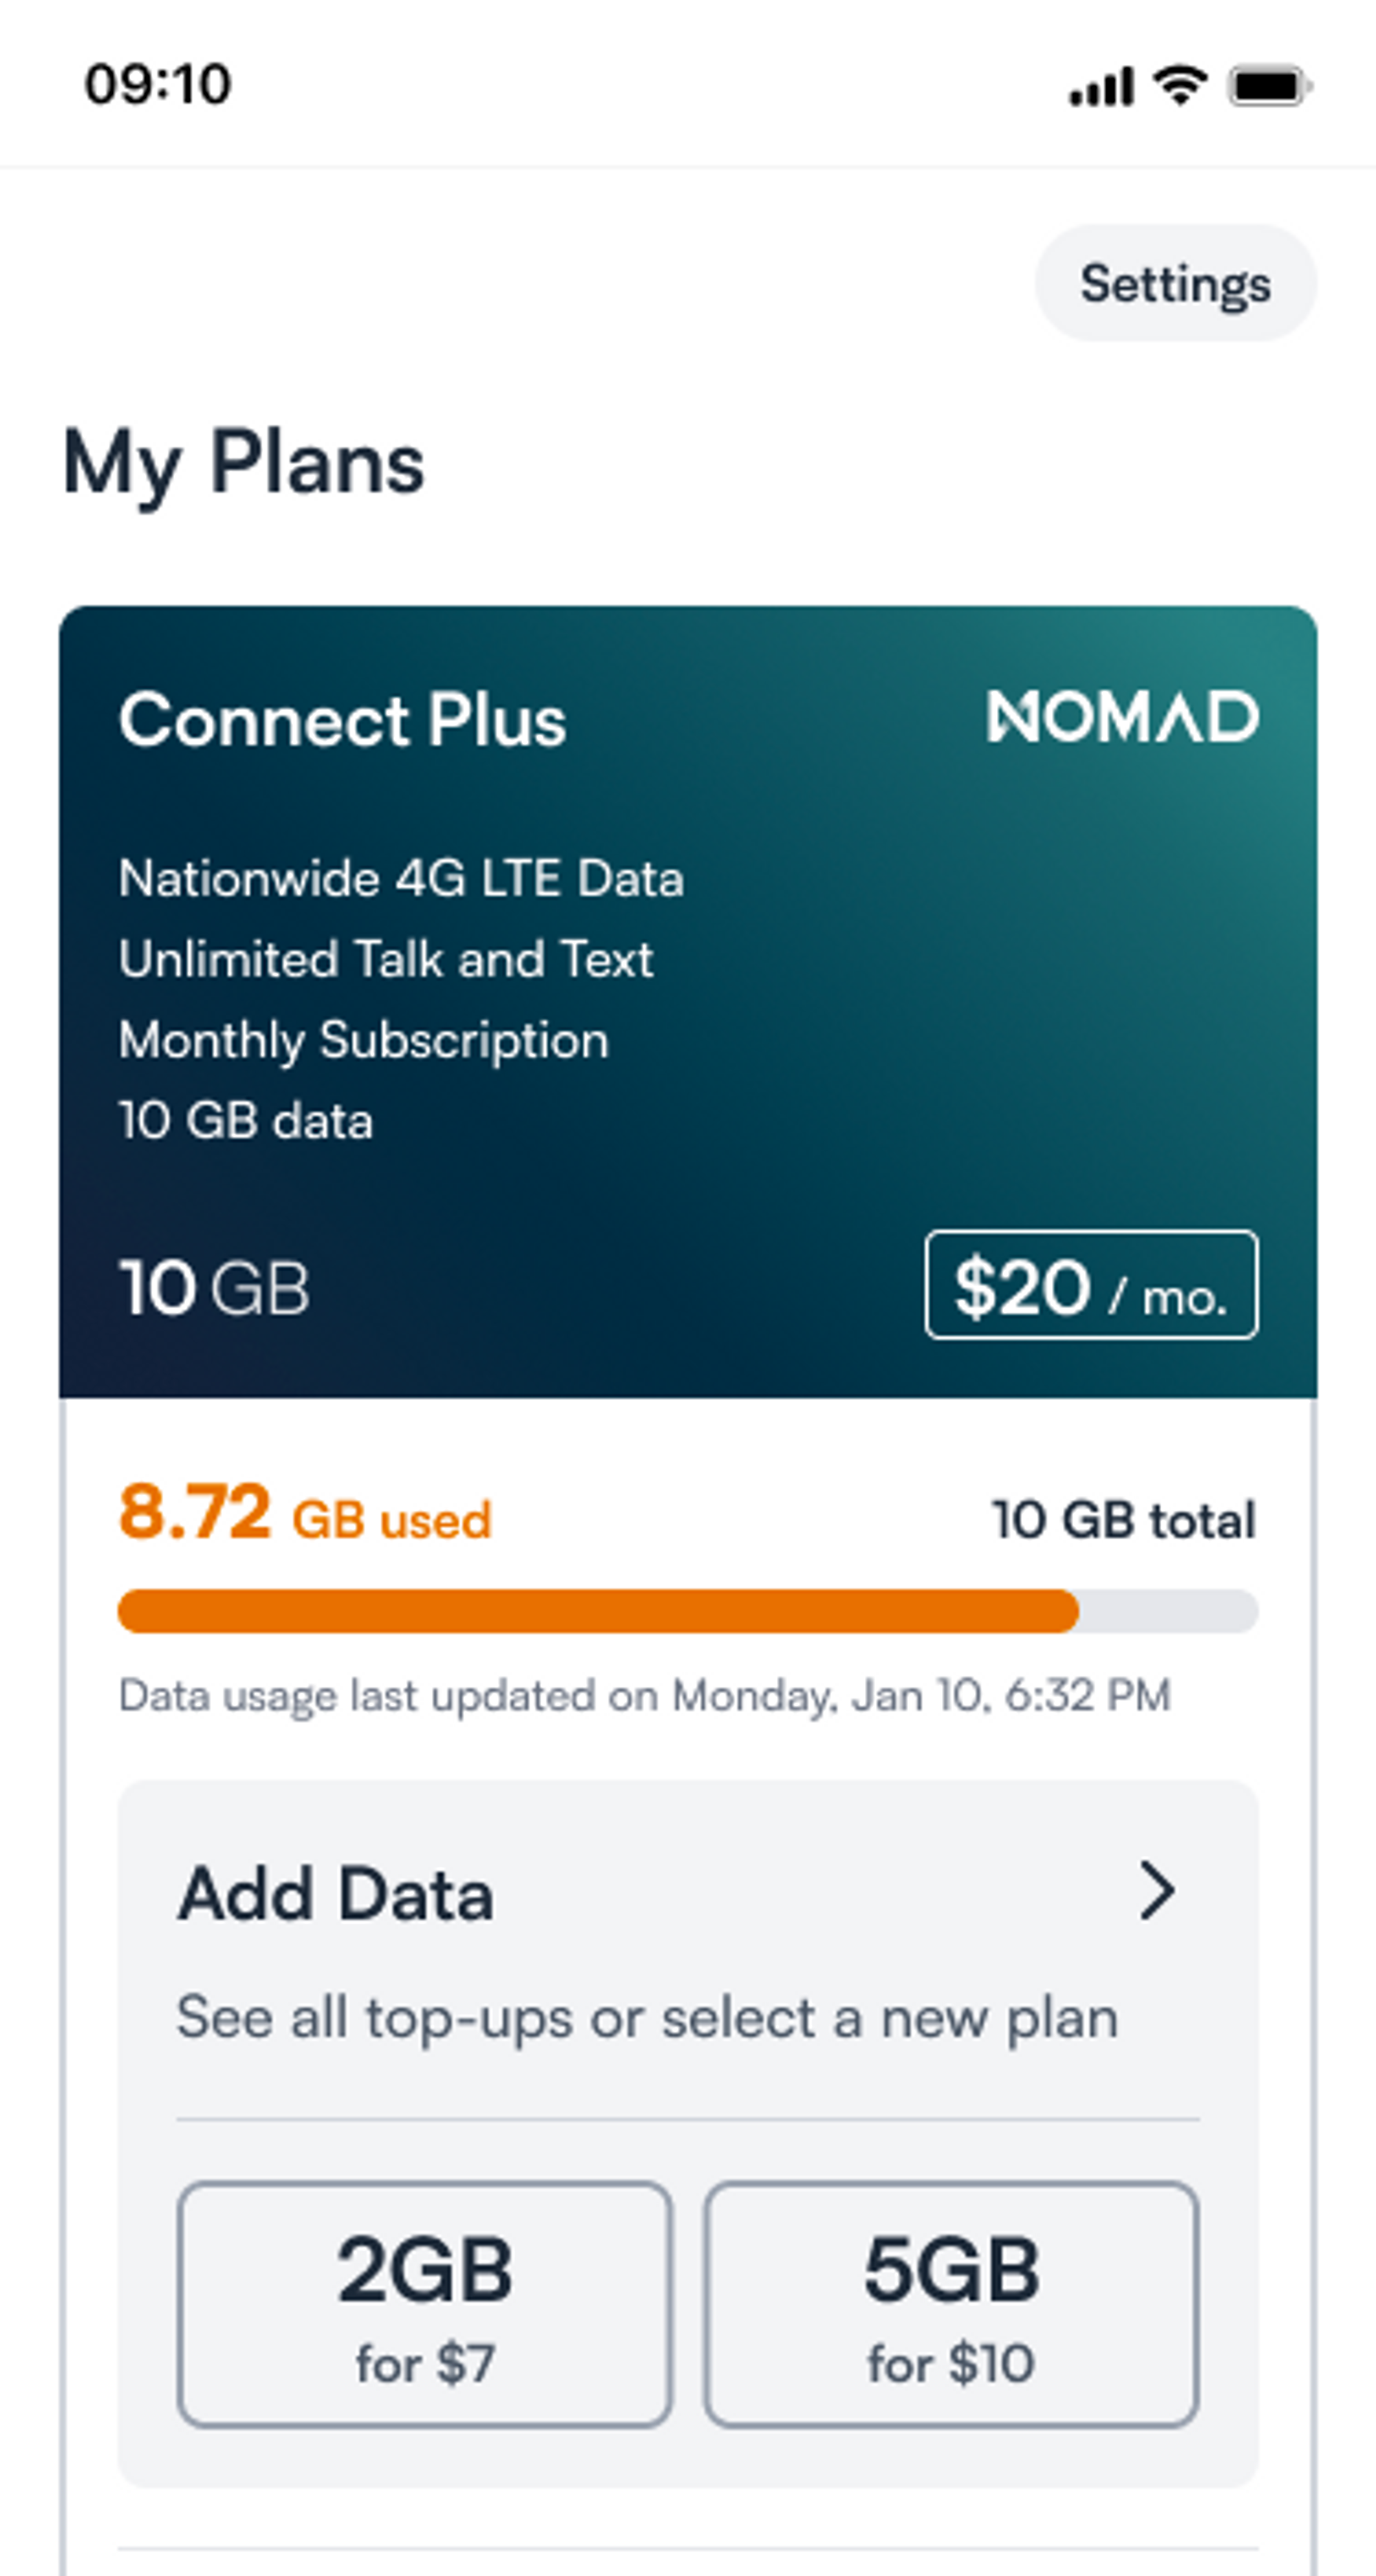
If your project has Usage Charts enabled, you can change your plans by accessing the Add Data card, which is visible in two locations:
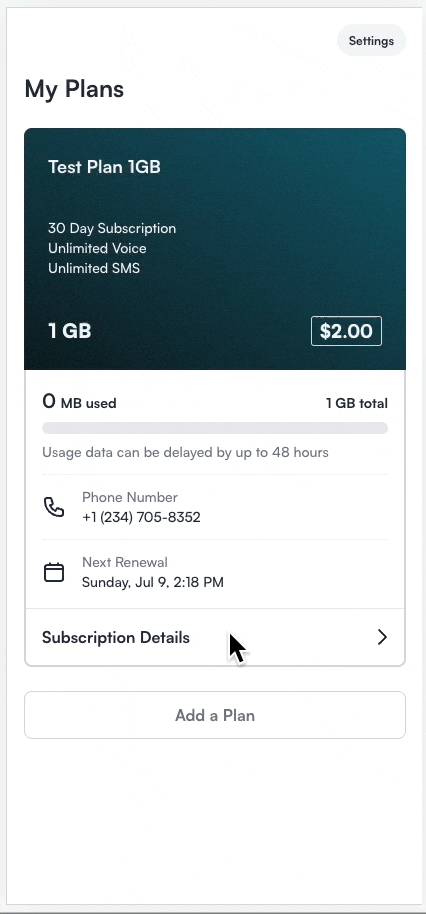
The Subscription Details screen can be accessed by clicking anywhere on the Subscription card.
The My Plans screen is Connect's home screen for users with one or more subscriptions. This option becomes visible once a subscriber reaches or exceeds 70% usage.
With Top-ups
If your project has Usage Charts enabled, you can change plans by tapping anywhere on the Add Data card except for the Top-up Quick Actions. Follow these steps:
Click on the “Change Plan” tab.
Follow the same flow for Plan Changes without Usage Charts.
Without Top-ups
This process is similar to changing plans for projects with Usage Charts disabled.

Canceling a Plan Change
If you need to cancel a plan change, follow these simple steps:
Navigate to the Subscription Details screen.
Look for the pending Plan Change.
Click on “Cancel Plan Change.”
Confirm the cancellation of the Plan Change.
You will receive a notification confirming the Plan Change was successfully canceled.
Need to Cancel a Plan?
🔗 Canceling plan documentation if you would like to cancel your plan.
We hope this guide helps you navigate your subscription changes smoothly. If you have any questions, feel free to contact our support team.